Wednesday 25 March 2015

Adding a Highscore System to Our Game


This scorescript gives you a score when you kill the enemy.
For the brief we were told that the game had to have a high score element to it, So we wanted to give the player a sense of achievement. I put in a piece of code so that once you had killed the enemy, it would change the highscore, This is just to put it in place, so the high score doesn't actually change at this very moment.

The game manager holds the scorescript, the pauser and the levelload script.
I had created a game manager, which holds the in-game scripts, which menas that they will work throughout the game, when the trigger is activated. These scripts here mean that you can pause the game, it loads the level of the game and changes the high score.


This makes the highscore change when you do better than the previous player.
I then added in the HighScoreScript. the score will now change, depending on what you kill and will also change on the main menu. We decided in the end to give 100 points to the player for each kill that they managed to achieve. I felt that this was fair because if it was 10, the total will be too low for the player to feel a sense of achievement when they played the game.

The score has changed when I did better.
As shown above the score on the High Score menu has changed when I achieved better. If I had more time I would defiantly go in and add in player prefabs so that the score would save.


Adding Music to Our Game


This is how we put music into our game.

I went onto YouTube to gather some Music.
For our game we wanted to have music to add to the atmosphere that you get when you are playing it. We originally wanted to get a composer from a partner university to create some music for us, so everything in the game would be original. Unfortunately this didn't happen in the end, and we had gather files off of Youtube to put in our game, We acknowledged third party content.


I then created a code to add the music into the game once its playing.
Once we had the files that we wanted, I created a piece of code that would start playing the music as soon as you were in game. It is also set so that when you are in the menu, the music will loop, so it wont cut out at any time. This is also in game.

The Music is being played.
The music is set as 2-D, This means that when you play, the volume of the sound is consistent, If it were 3-D the sound will change depending on where you were in the game. These apply more to sound effects, like bullets whizzing past.


Creating a Main Menu for Our Game


For the game, we had to create a piece of code as part of the requirement. I also wanted to give our game a main menu, so I thought that it be most ideal if I headed in that direction. I want onto YouTube and watched a tutorial of how to script and make a main menu look good.

The final main menu.
As you can see from the image above I have created a main menu, There were many pieces of code and animations that went into it. There was also a particle effect. All of the buttons work, and they actually take the player into the game menu.


The menu as a scene.
The scene set up in unity looks fairly complex as it has so many elements running through it. The camera is attached to a canvas that it doesn't move. When you click on the buttons in the game it will take you into a new scene, though depending on which one you select, it will activate an animation where the menu will slide out and then a new menu will slide into the scene.

Controls panel.
There are several different panels in the game, one of them is the controls menu. This is one of the those animations, where the old menu will slide of screen and this one will appear on screen. This menu just gives  you a brief description of the controls, like how to move and how to shoot.

Highscore panel.
Another one is the high score, which updates when you get a better score than the previous player. We did not have enough time to add in the player prefabs to the line of code for the high score, so it wouldn't save the high score once you had left the game. It does however show it on game and if it is beaten, it will change to the new score.

Game over menu.
There is also a game over scene which is in a separate scene from the player dies and they are sent to this scene. All the backgrounds for the menus where created by rendering the models and then taking them into Photoshop, there, I went over them bringing out different pieces of light, giving it a backdrop and posing them. Once you have been destroyed in the game, you will be taken into this menu, where you can choose to go to the Main Menu or can replay the game again.

MenuManager script.
The menu manager script controls the menu and their transactions. As you can see from the piece of code it is fairly uncomplicated. This just gives the menus the freedom to roam between each other.

Menu script.
This controls just the menu, with it making sure that all the cameras stick to there positions and that the animations take place. This also has the animation taken into account for when the buttons are clicked and the menus move away.

On click selection to take you to other areas.
This area controls where the button takes you when you click on it with the help of the loadlevel script but has to be set up here. So if you click on the Start Game button, it will take you into game.

The animation that works with the menus.
I had to add an animator component which meant that the animation would take place. Again this would just be the button and menu leaving the screen and a new menu reappearing on screen.

The particle system that is present on the main menu.
I also created a partical system for the main menu, meaning that when the menu was left and observed, a sparkle would appear on the screen. This was great to put in because it meant that the menu wasn't just a picture, but it was coming to life. It made the menu interesting and it was something different.

The music that features on the main menu.
I added a audio source which meant that we had music playing throughout. We grabbed an audio file that we had and placed it in the menu. When you went into the game, the sound changed and you got a more adrenaline pumping song, suiting the game.

The levelload script.
The leveload script allowed the transaction between the levels meaning you can start the game. This helped kickstart the game.

The mouseunlock script.
This unlocks the mouse so that the game allows you to use the mouse when the game ends. The mouse locks to the screen when you play the game as it controls where you shoot, so when you come back to the main menu, you need to use the mouse.


Creating a Ship for Our Game


We had all designated different tasks in our team, George was going to be doing most of the code, Jay was going to be making the enemy ships while Ben was going to create the Space station. That left me with the task of creating the good guys. I had always been a fan of them. whenever I play a game I have to be good, it's just not in my nature to be a bad person, good is whats right and makes everyone take their own path.

We decided early on in the game development that we were going to have two different types of ships. One of the ships was going to be a colony ship, something that was going to escort the survivors out of the battle and was a ally that you needed to protect. The other ship that we were going to make would be that of the player ship, an old rusty machine that is the last piece of defense that the Space station has, so it needs to look grimy and old.

I first started off with creating the colony ships, this was fairly simple as I knew straight away what direction I would be heading in. This ship is suppose to be very bulky, with not a lot of weapons to defend itself, so I thought that the ideal inspiration would be that of the pillar of autumn from the halo series.

Inspiration: The pillar of Autumn and various UNSC ships (Halo)
I pretty much only had one idea on this section, I had been dead set on this one idea and I felt nothing could fill this ships spot. I went straight onto Maya and started to build it. It has quite a simple design to it, but the thing is that I wanted this to have not too many poly's. This was because this has not as many key features as the main characters ship. It also isn't an key part of the game, it is required as much for game play. I am fairly happy with the ship, it has no weapons on it but there is plenty room for improvement, which will be brought up if I have time, though when it is textured, it will look more impressive.
Rendered view 1 of colony ship.
Rendered view 2 of colony ship.

Rendered view 3 of colony ship.

Rendered view 4 of colony ship.
Update:
With our game we paid so much attention in other directions that it would now be impossible to insert this in game with any useful mechanics, so we, as a team, have decided that it would be best for the game to leave the colony ship out. This means that I can fully direct my attention towards the rest of the game, such as the menus and pieces of animation.

When it came to making the player ship, I already had some initial designs, such as the concept art that I had made earlier, but nothing really up to standard, so the best thing I thought, was to start from the beginning. I asked my team, as a collective, what they would like to see in the ship and we all settled down on an idea. The general feel was that I was going to be looking at not only spaceships, but jet fighters. everyone also agreed on a shape that they really liked, that od the one like in Star Wars, an extended triangle to spear head an attack.

Inspiration: Jedi starfighter (StarWars).

I was actually quite impressed with my design, it looked quite original and actually did look like a spaceship. Though there were several problems in the ship itself. The model was way too high poly. There would have to be an improvement on it if we were to stick it into the game and several things would have to come out, such as the engine parts and the vents. One point that I ma especially impressed with is the guns on the ships, they look like they would do the job. After removing all the excess poly's, the only thing that was left to do was to texture the ships.

Rendered view 1 of player ship.

Rendered view 2 of player ship.

Rendered view 3 of player ship.

Rendered view 4 of player ship.
Using what I learnt recently when it came to texturing, I sent about and got snapshot of all the polys in the ship and then took it over to photoshop. Here I attacked a scratched metal over a layer of silver and played around with the options until I got a result that I was happy with. The next thing to do was to add excess color and materials, such as the cockpit and the bullet holes on the ship. Then we saved this as a targa file. then by simply applying this as a material, we could then attach to the ship.

The U.V's being textured.
I was pretty impressed with the result, the only thing is that due to the low poly, the ship looks quite basic, which was something that could be improved later on, but for now, I was happy with the way that the ship had turned out. Perhaps if I adjusted the darkness on the ship, it will look much more gritty.

Rendered view of textured view 1.

Rendered view of textured view 2.

Rendered view of textured view 3.

Rendered view of textured view 4.

Creating and Texturing a Boy in Maya


We were given the task from Robin to create a boy in Maya and Texture him. We were given reference as well. By doing this we had a set of instructions/guidelines that we had to stick to. Using Maya, we would make this person and then cut and unfold the U.V's, then taking it into Photoshop, we will add the texture and then after saving it as a targa file, We will bring the U.V's back into Maya and place them on the character.

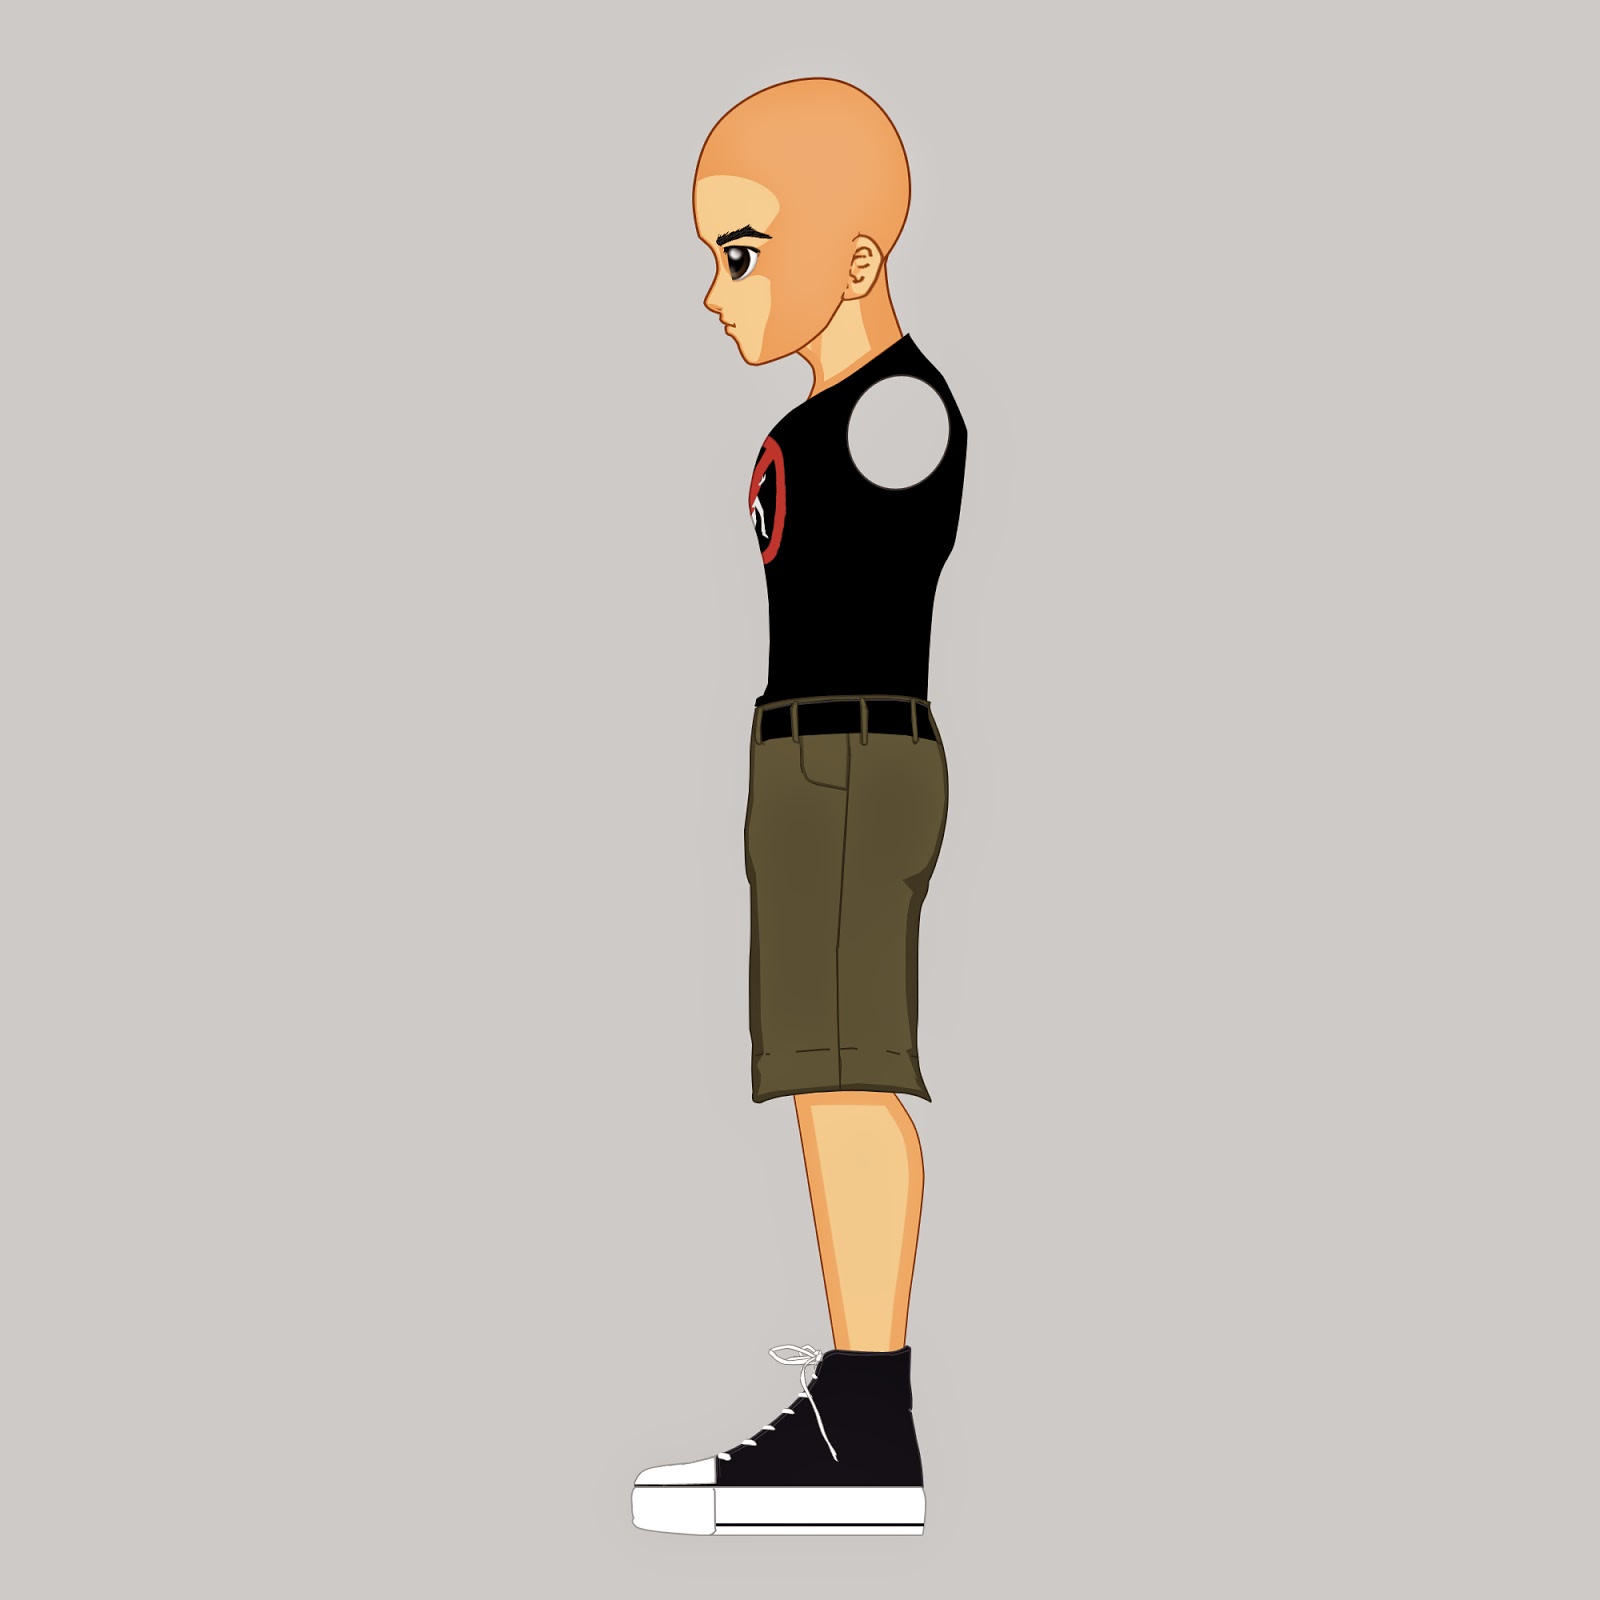
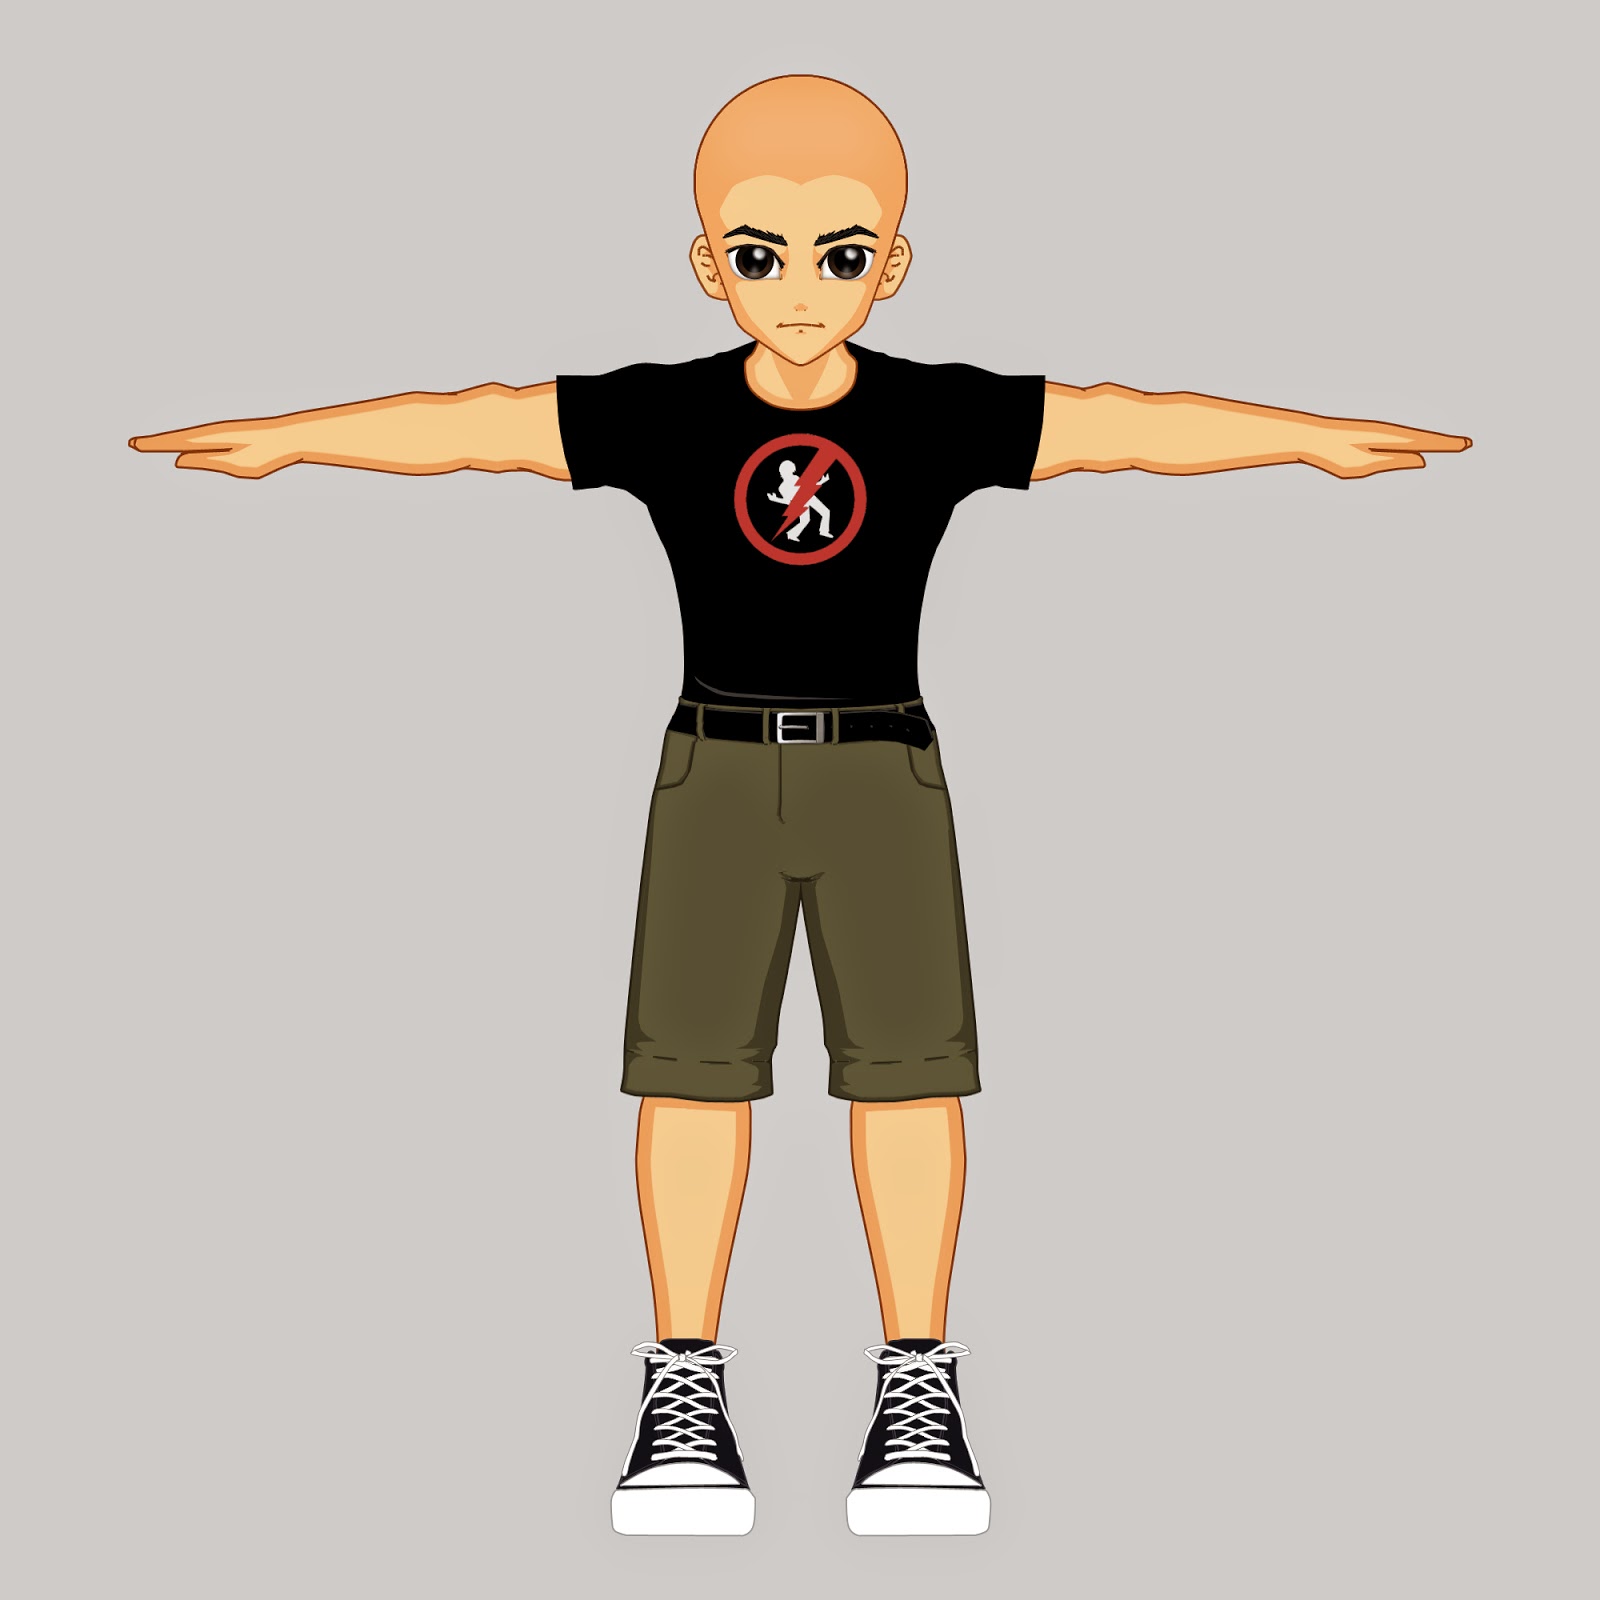
Lucky for us Robin had a scene up in Maya, in it was a two blocks and the two pieces of reference in the right position. When we had modified the block, the other one would end up doing the same thing, so he had mirrored it so that we get a perfect result all the way round.

The side of the reference.
The front view of the reference.
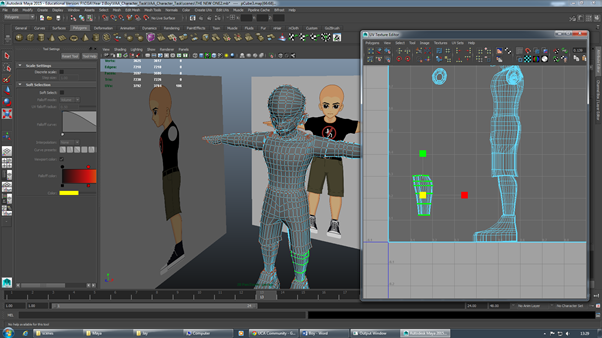
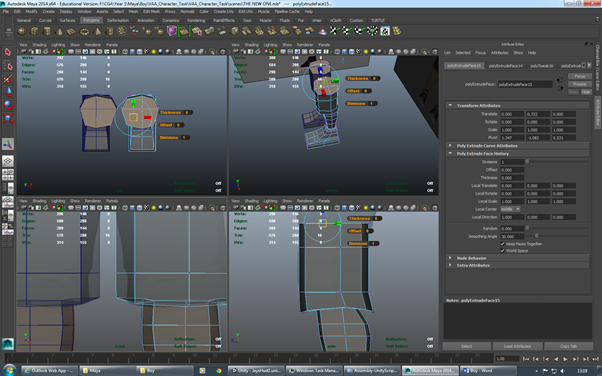
The scene was pretty straight forward, all we had to do was shape the shoe in a perfect position, this was very simple as all I had to do was extrude and then rearrange the edges so the the geometry stayed perfect. The main idea was that this character was there to be animated, so the everything on the character needed to be in the right place. The rest of the character was simple, if I needed a bit of an edge, I would move a vertex or if I wanted to make the character more round, such as his legs and torso, I would move an edge into a diagonal position.

Using the reference to model the character in Maya.
As the character was being mirrored, all that we needed were the first half of the model. After we had got the character to a complete state, we would then use a tool called the merge vertex tool. This was extremly helpful when it came to sealing up the model as all I had to do was merge a few vertex's.

A completed half of the model.

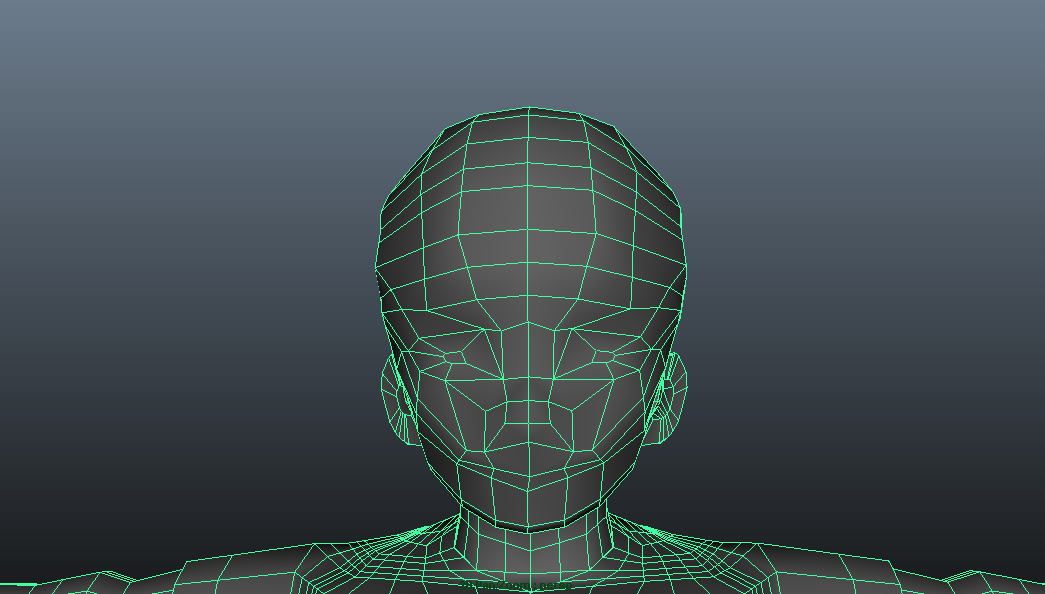
The finished head.
The head was by far, one of the hardest things that I have had to model on Maya, this may be due to the abnormal size and the roundness on it which made it difficult to model. Another thing that I found quite difficult to model, was the ears, it was not as if you could pull them out, it required a lot of thing to get past this stage, though when I had got past it, I was pretty impressed with the result. I also must admit, I am pretty proud with the way that the body has turned out, not too many blocks and with an overall round shape.

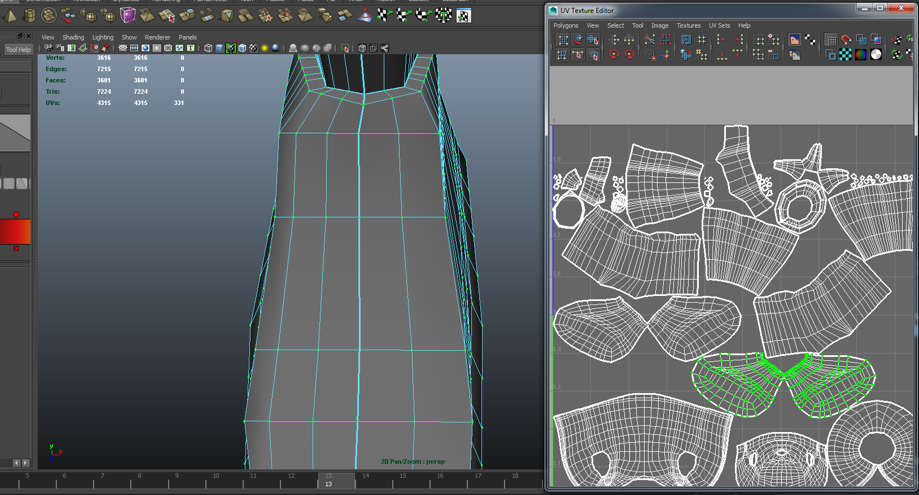
Cutting the U.V's.
The next the stage of the model was to go into the U.V's. I first went into mapping so that the U.V's were not going to be messy, this also meant that when it came to adding textures to the piece on Photoshop, they were going to be in the right position. The next thing that we were going to do was go into the U.V texture editor, from here, we can edit the U.V's, judging where to cut them and unfold them. With the editor open I selected the edge tool and clicked on the edges that I wanted to cut.There was a tool in the editor which allowed me to cut the edges. Then when I had everything that I wanted cut, I would select all the U.V's in that cut section. The editor also had a tool which meant that I could unfold the cut object. This was perfect as we now had a flat surface to paint on in Photoshop.

Unfolding the U.V's.
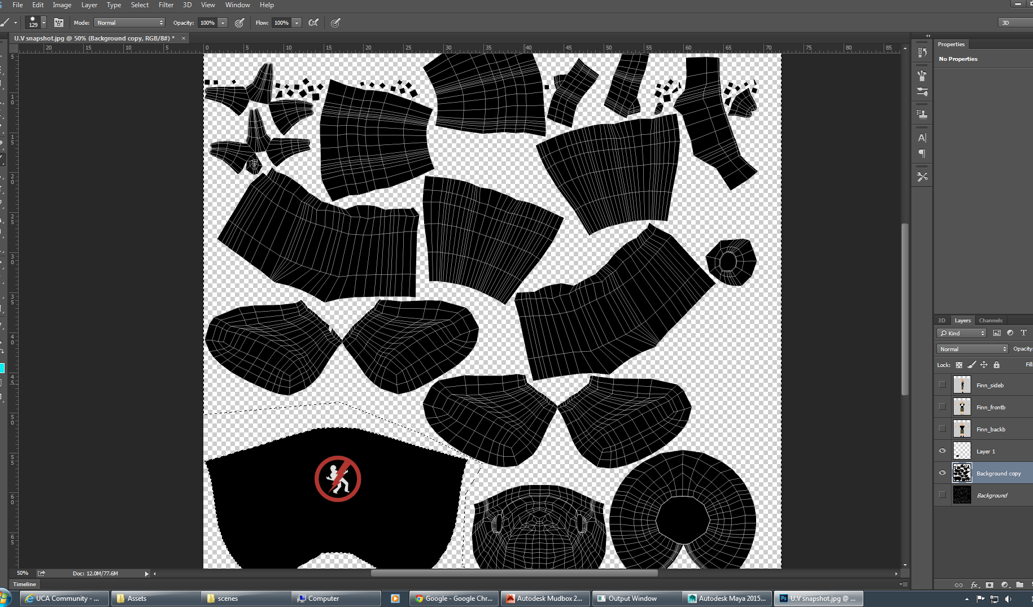
The next thing that we wanted to do was create a snapshot, which was simple enough using the menus, The reason being that we were going to take this Photoshop and this sets up the perfect canvus to make the transition between the two different programs. Once we open it up on Photoshop, the next thing to do was to add the textures onto it. Now, this could be done through a variety of different ways, one of them being painting over the top of the U.V and placing images over the top to support it. This was the route that I took. It was extremely simple and the way that I checked it where by saving it as a Targa file and presenting it as a material on top of the model, making sure everything was in place. I continued this until I had got the final result.

Texturing the U.V's in Photoshop
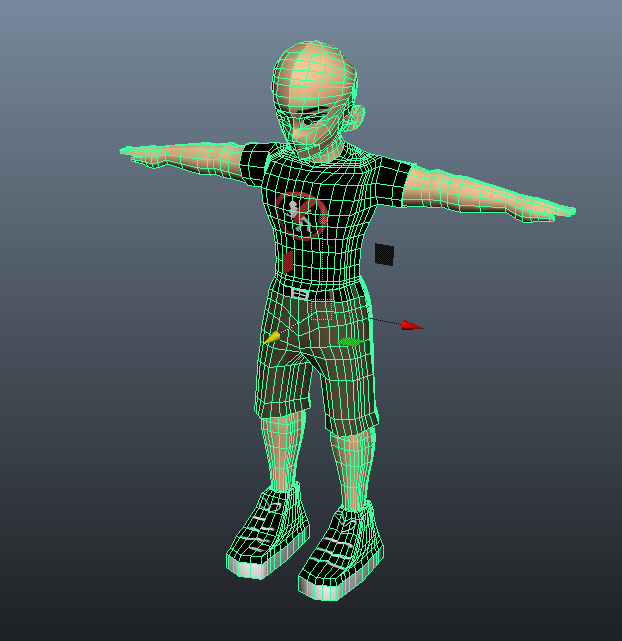
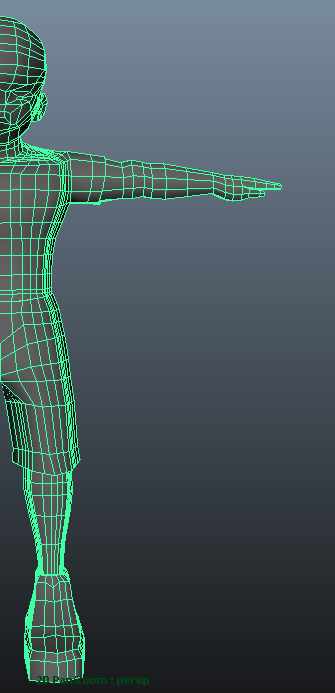
Here I have to finished model which has been clicked to show the geometry of the character. There have been some areas where I may have added a bit too many edge loops, some which are not doing anything, but besides that, everything seemed to be working perfectly and looked to be in the right order.

The mesh of the fully textured.

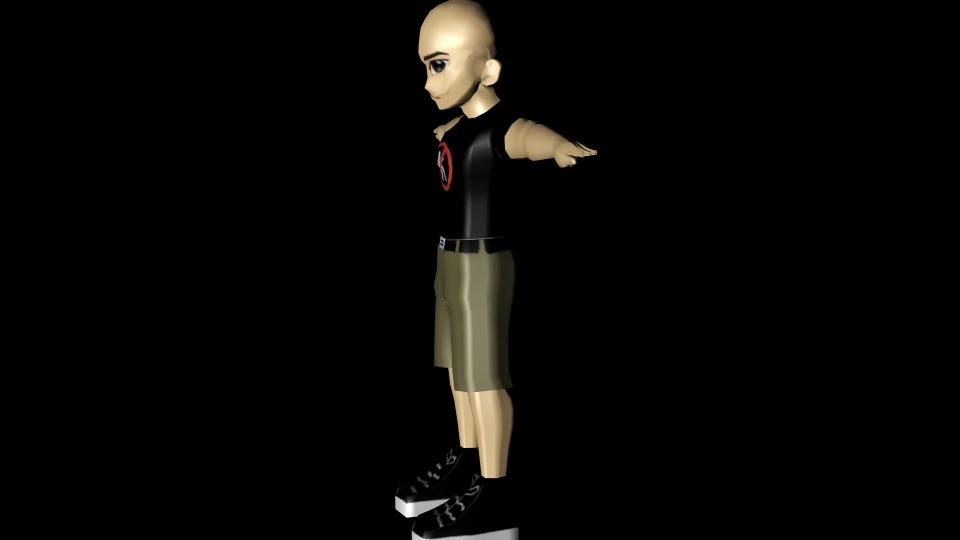
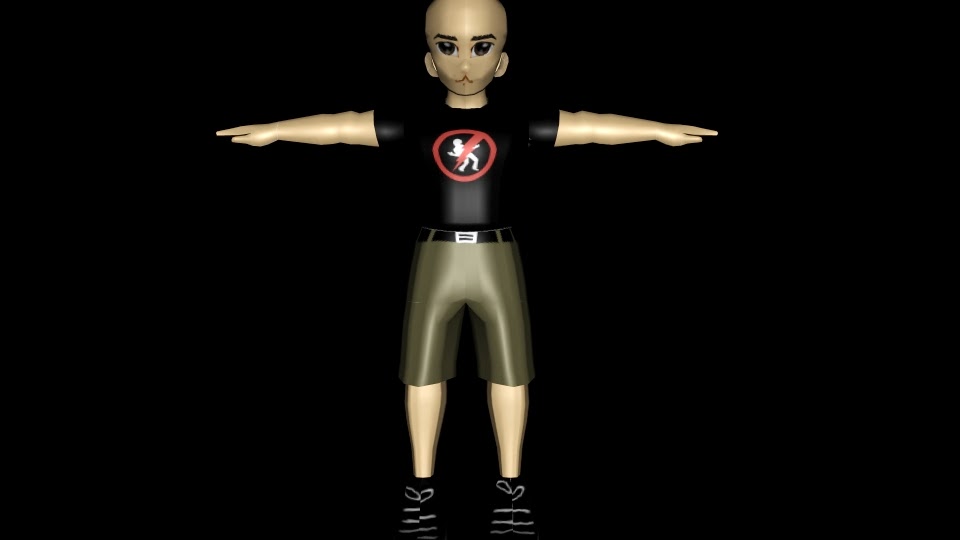
A side profile of the final model.

A front on view of the final model.
Once I got into this project, I actually really started to enjoy it, but the part that I was surprised about the most was when it came to texturing the character. If you look through my past experience, there has been a lot of struggle in this area, so to come out with a pretty decent result, I was more than happy.

One thing that did annoy me was that I had made a mistake when it came to cutting the U.V's and by the time I had realised it, It was already too late to go back and alter it. The shoes, texturing wise, was actually quite had and I think that it may be down to the fact that I had made a mistake and could not fix it.

Sunday 22 March 2015

Creating a dossier for Our Game


The first thing that I wanted to do for our game was to create a minor dossier for our team. Not only would it contain all the essentials, such as a variety of mood boards and story boards, but it would also contain a large amount of research that had been put into the game. The first thing that I put into the file was the notes that I took. Over the first week or so, me and my team had several discussions on what the game should consist of, what the enemies should look like, what the main mechanics of the game play like, etc.

The notes:


Notes taken for "team meetings" (Me)
Here are the notes in which I have been taking in our team sessions. Here is just rough ideas and feedback I have been getting from the group as a collective and how we can move on. This was a perfect starting point as we all had a etched out a rough idea of what we were doing and how we could achieve it.

The mood boards:

Mood board for spaceships (Me)
The next thing that we as a team went on to do was go and create different mood boards. I was designated with the task of creating one for the player spaceship, where as jay was given the enemy ships. By doing this for both the ships, we had inspiration and reference. This meant that if we ever got stuck for ideas or are struggling to create a certain piece, we could come back and refer to our mood boards.

Mood board for enemy spaceships (Jay)
Research:

I decided that before we started to get down with the work, we needed to have some research, something that we could also refer to. Also by doing this, I could see the key mechanics of what makes a great high score flying game. The 4 games that I ended up looking further depth was Geometry Wars, Crimson Dragon, Asteroids and War Thunder. All had great aspects to them that were much different to that of each other.

Research into successful highscore flying games (Me) 
The Story Boards:

A rough story board (Jay)

Detailed drawings (Jay)
We decided that we were going to do a mood board. This was perfect when it came to telling people what were going to do and what our story/objective was going to be. As you can see, we did two varieties. One being a version done in pencil, but stills tell the general story and concept. The other one that we did was create one that had been touched up. They both contain panels which would tell information to the reader about whats going to be happening in this part of the game. In the Photoshop mood board, it also gives a more realistic take on what it would like, merging with all the colors and sketches.

Pg 1 of detailed story board (Me)
Pg 2 of detailed story board (Me)


Pg 3 of detailed story board (Me)
Concepts:

Detailed concepts  pg 1 (George)
Here are two concepts that were made be a member of our team. He is a fantastic artist and really did manage to nail down the aspects of the ship that we, as a team, were looking for. As a team, we were all thinking that we need to look at a mix between flesh and bone and George has managed to get that on point.

Detailed concepts  pg 1 (George)

Before paint in photoshop (Me)
On the other hand, I was tasked with the player ship,  As I felt that I was not that skilled when it came to painting from free hand, I thought that it would be much better if I made the ship in Maya and then painted it over the top. It was a fairly long winded way of doing it, but looking at the end result, I can honestly say that I am extremely happy with the way it has turned out. It turned out to be a good piece of concept art.

After paint in photoshop (Me)
Starting the designs:

First designs (Jay)
Again, Jay was extremely talented when it came to working in Mudbox or Zbrush, so he set of straight away, composing a basic model of what the enemy ship could look like. Blown away by the results that he got, we, as a team, were all desperate for him to continue it on.

One sheet:

Our one sheet (Ben)
Coming back to the task that we had done earlier in the year, we were told that we needed to create a one sheet. This will tell the producers what are the basic outlines for the game and what the vision was going to be. This included the environment, the ship design and how the score system will work.

Designs for the space station:

Screenshots of designs pg 1 (Ben)
We also had some designs that Ben had been putting together on Maya. In our game, there will be a space-station floating around. This looked extremely cool, but had a high poly count. At this stage, that doesn't matter that much, but what was important is getting some designs done.

Screenshots of designs pg 1 (Ben)
I am happy with the way that the game is going so far and I can only hope that the form and the pace stay to a high standard. This was just a quick skim of what features the journal, but still, I think its safe to say that the project is going good.

The full dossier (Me)