Today we were given a task by Robin to make sure that we retained all of our Maya skills after the period that we had off for the Christmas holidays. As I have quite a passion for Maya, I was eager to get started with this lesson.
We were told that we would be modeling the USS Enterprise off of the Star Trek film and T.V series. I recently watched the newest sets of movies and thoroughly enjoyed them, so I was looking forward to making something so iconic.
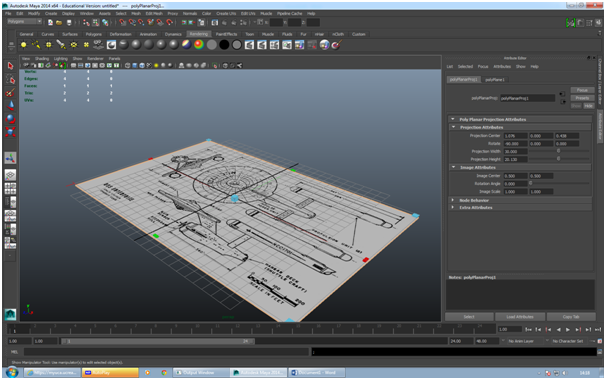 |
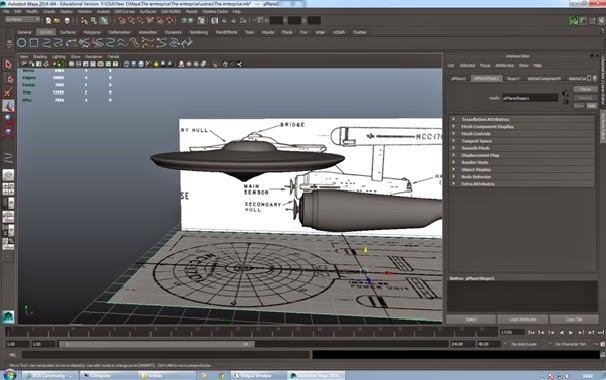
| Pasting the plan onto the plane. |
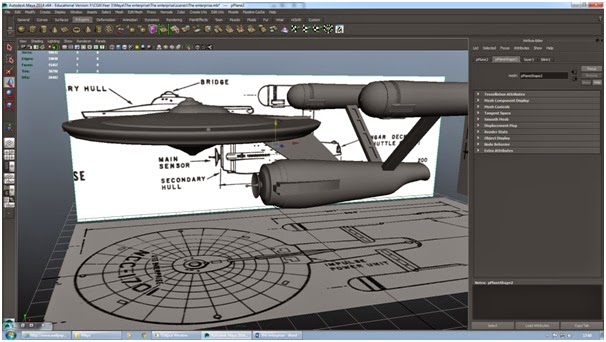
The first that I had to do was get the plan that Robin had given us and past it onto a plane. This was simple enough. All I had to do was create a plain and type in the right measurements to make sure that the ship that we are going to make will be the right size. On the plane I created a Lambert on it so it had a color and changed this to the image that I wanted. This meant that I had the plan ready on the plain.
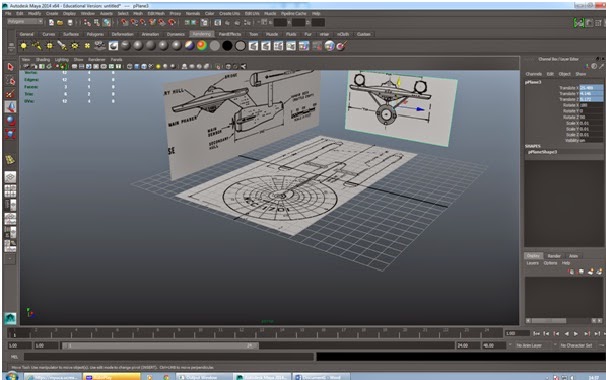 |
| Lining up the plan. |
The next thing that I had to do was make sure that the plans were all in the right place. I used the insert edge loop tool to split the different images apart. After this I duplicated the Image twice and then simply deleted the parts that I didn't need on each one.
I had to line up the perspective properly so that the ship that I am going to build will look right, again all I had to do was use the rotate tool and then using the bottom picture of the ship, make sure that it's lined up properly.
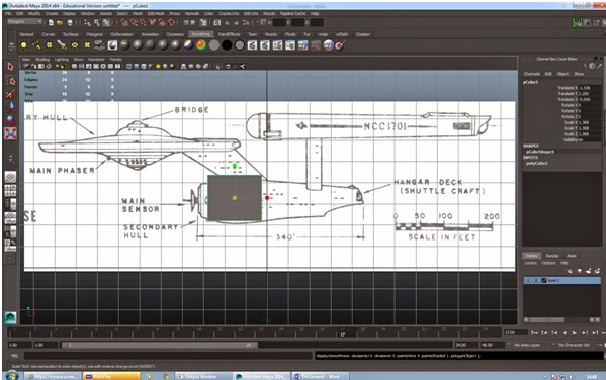 |
| Starting at the secondary hull. |
Now that It's lined up I started off the secondary hull. This was something that Robin was taking us through at the same time, as most people found this difficult. We started off with just a cube. We lined this up with the different planes and set to work.
The first thing that we did was press "3" on the keyboard which makes the square more organic. This is a perfect tool when it comes to creating things such as characters or creatures. In this instance, it was very useful in creating the ship. Once I had the basic out line of the ship ready, I selected the vertex's on the ship and moved them into a position that I was happy with.
 |
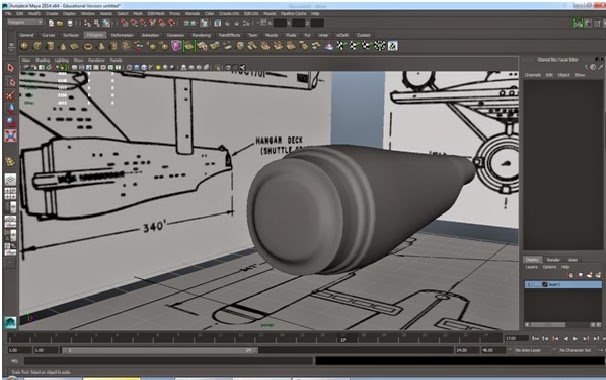
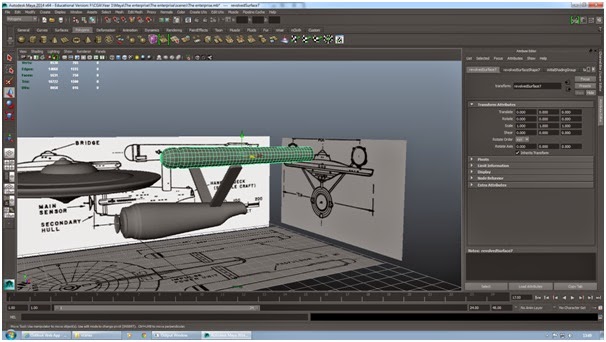
| Rounding it off using the extrusion tool. |
To finish off the bulk of this ship, I extruded the front of the ship. As I had done this many times before it was a simple task. All I had to do was extrude, re-size it , then extrude and pull it forward. I did this till I reached the radar at the end. This technique gave it an extremely crisp edge and made it quite professional.
 |
| Giving a smooth finish. |
The next thing that we had to do was create the dish on the front of the ship. Now, There are many ways that we can go around this, the problem being that most where time consuming. Robin showed as technique which was extremely useful and wish I had learnt earlier, the EP Curve Tool.
 |
| Using the EP Curve Tool. |
Once we had created the line that we wanted, its a lot to understand from here. You have to first select the move tool and make sure that you go to "modify" and then "center pivot". Then by holding down just the "D" button on the keyboard, we can move the pivot to wherever we want. It needs to be in the middle where the line will rotate. The next thing that needs to happen is you select the "surfaces" bar at the top and select "revolve". After this you choose the surface you want to rotate on and then you get this result.
 |
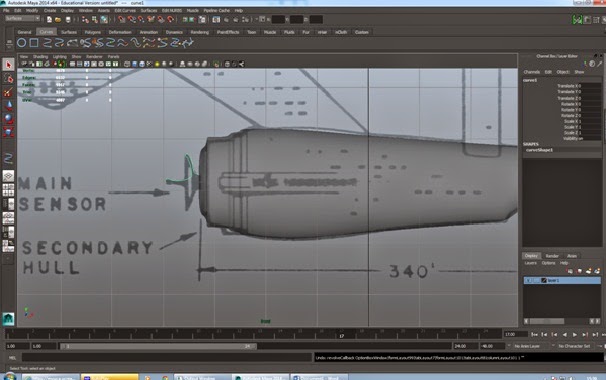
| The result of the EP Curve Tool. |
The tool has made things so much more simpler and now when it comes to other parts of the ship, I started using the same tool. In the picture below, I started to main dish, again using what I had learnt and then did the rest in separate parts.
 |
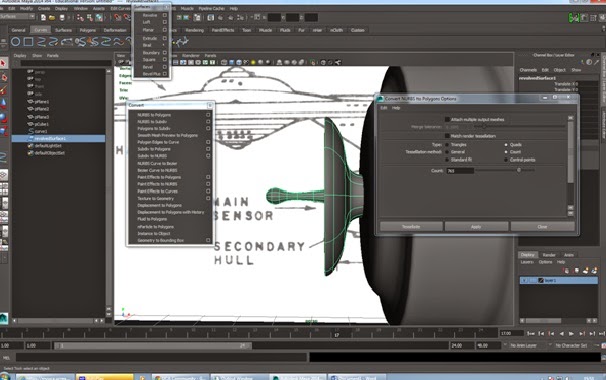
| Creating the central hub. |
The trickiest bit of this part was getting top perfect. I need to modify it once I had made it, so I selected the piece that I had made and went to "convert" and then clicked on "NURBS to Polygons". This means that we can edit it later. The only problem with this though is that it doesn't look as smooth, so it does require some play around.
 |
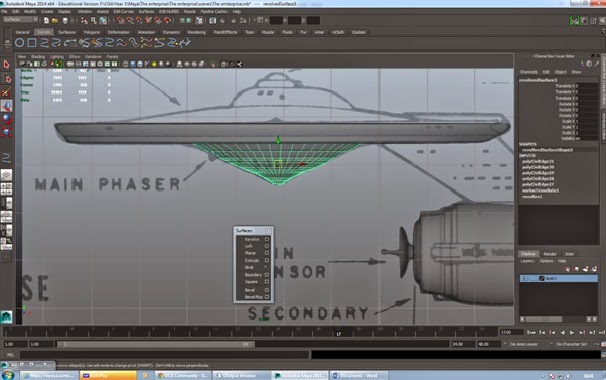
| Finishing the front of the ship. |
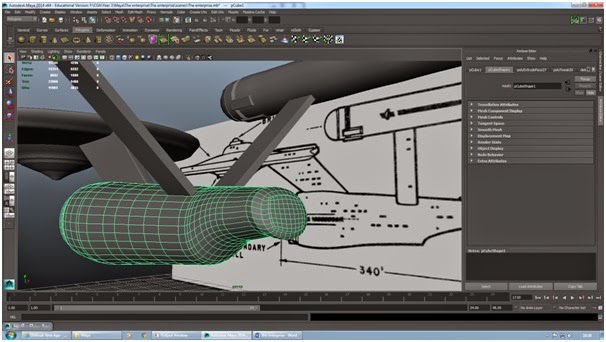
Once the front of the ship looked sleek, the next thing that was required was the jets that power the ship. I first started off by creating the stands that will hold them. By just creating two cubes and lining them up, then putting them in the right position, I had the stands.
The thing that I had to do was the jets, by using Robin had showed us with the EP Curve Tool, I did a line that covered half of it from the top. Then by revolving it and coveting it, I could extrude the end to finish it.
 |
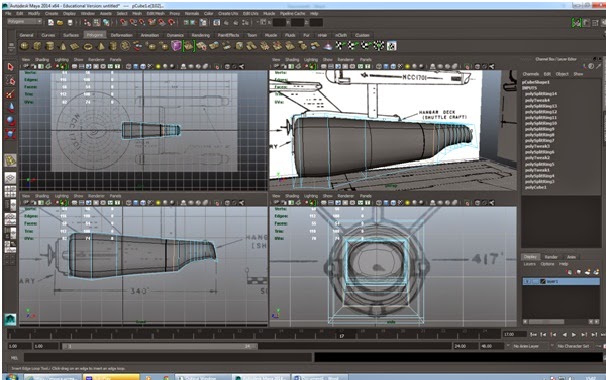
| Creating the engine and lining it up. |
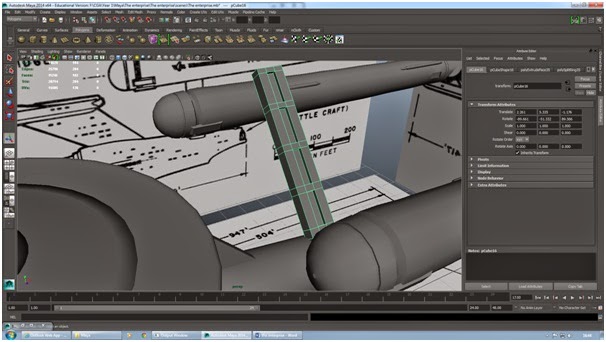
The minor details had to go onto the ship, such as pipes. I did this by creating a cylinder and extruding it out until I had got a result that I was happy with. I had learnt a lot from past experience of when I had created the game myself and doing the piping in that took me a long time, so I used the lessons there to help me.
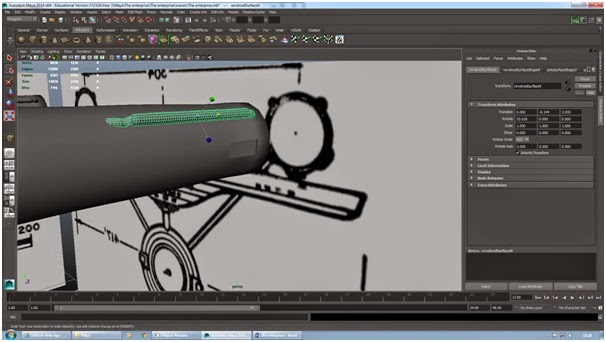 |
| Adding a fuel pipe to the engine. |
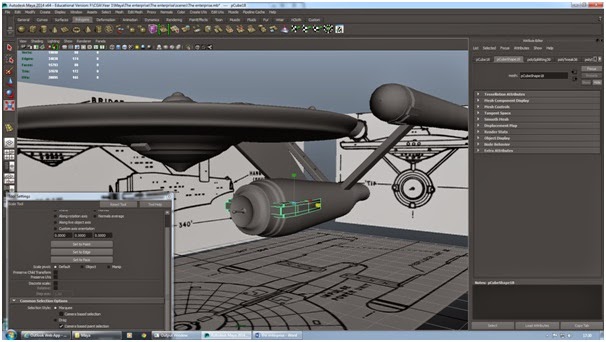
Once I had finished the first get engine the last thing that I had to do was duplicate the engine and rotate it so that the details were facing the other way. This is an extremely small step in the process but gives it a professional edge.
 |
| The engines have been detailed. |
There was detail that I missed out when I was creating the stands that held the engine, So I deleted them and started again. By doing this I felt that I had the freedom to take it wherever I wanted. By using the "Insert Edge Loop" tool, I managed to create the gaps that I wanted in the piece and then I "beveled" the edges so it gives the structure a soft corner.
 |
| Putting the detail in the structure. |
I decided that this would be the time that I will go back to the bridge and shape it. This step was quite easy as all I did was select the half that i wanted to modify and kept moving and re-sizing it until I had the perfect shape.
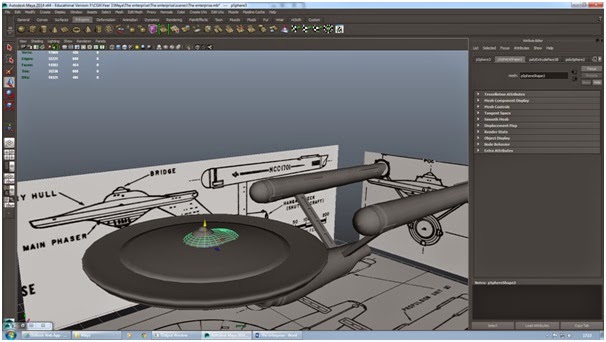 |
| Shaping the bridge. |
As I had got the basic parts of the ship done, I felt it was now time to add in the last bits of detail. At the back of the ship there was a bump at the end. I decided that I would replicate this by selecting the faces at the end on the ship and extruding them.
 |
| Extruding the back of the ship. |
I had the last detail to do, such as the phaser and other sections of the ship to put on. Again, me being in my comfort zone, this was easy to do, just by extruding and lining every thing up so that the model was the right size.
 |
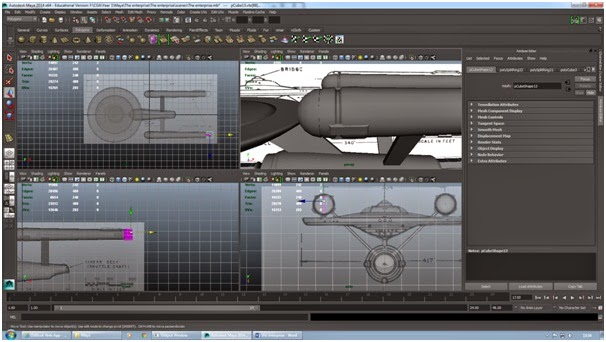
| Lining up the last detail. |
The very last thing that I did was soften and harden certain edges, to give it a crisp finish and make this model actually look like a spaceship. The only thing was, that I wasn't happy just leaving it there, I decided that I was going to render it.
 |
| The model is finished. |
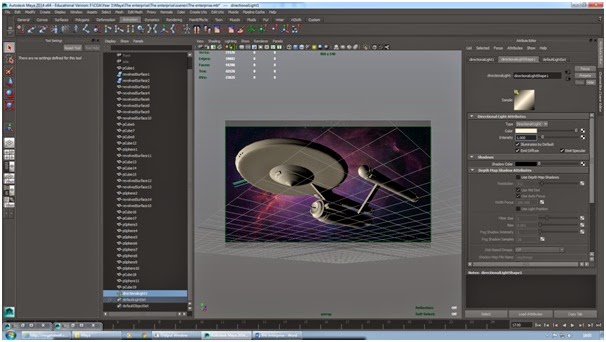
The setting for render where quite easy to get a hold of. All you you have to do is set it so that the menu says "rendering" and then click on "render current frame". I thought though that I wanted to create the illusion of shadow, so I decided to add a spot light. This made the ship look like it was sailing past a sun and worked really nicely.
 |
| Getting ready to render. |
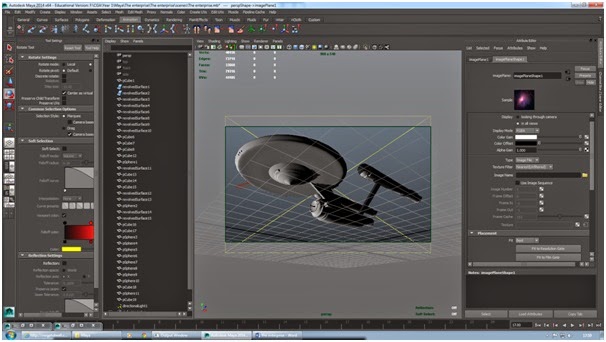
I also wanted to make this ship more realistic and different to others, So I added a background to it. I got a large plane and placed it behind my ship. I then applied a Lambert to it so I can add a file of my choice to it. The file that I chose was a deep dark space.
The next that I did was change the color of the light to give it a more yellow sun effect onto my ship, adding more realism to it, I then decided that I would render the frame.
 |
| Changing the tone of the light source and applying a background. |
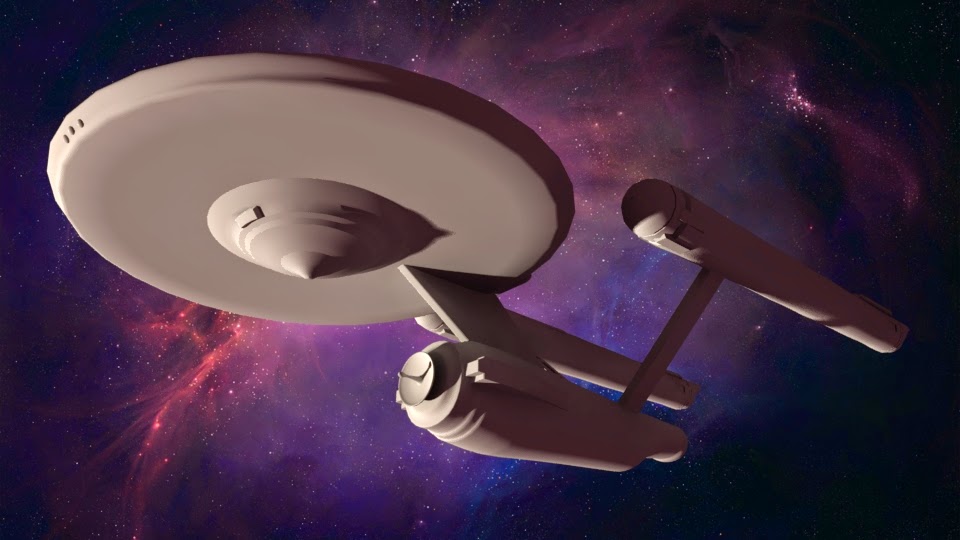
The rendered final image came out better than I had expected. The color and texture is not there but the model looks clean.
 |
| The final model. |
I'm really happy with the result that I got today. The shadow effect has given it much realism and makes the ship look like its passing a sun.
I'm really glad that I have managed to retain what I had learnt before the Christmas period and in my first full Maya lesson, be able to create something such as this. I need to make sure that I strive to keep this up and continue upon this achievement.
No comments:
Post a Comment