For a homework assignment set to us by Robin Ledger, we had to create a fish using the program Maya, I recently touched up on Maya in my recent blog post "Our First Try on Maya". To get to grips with what were going to be faced with over the next 3 years. Luckily for us we had Lynda.com to give us clear, simple instructions on how to create this 3D fish.
In a tutorial that has been created by George Maestri, we follow him while he shows us not only how to create a fish on Maya but to also use Maya's hidden tools such as the different ways of shaping an object and creating more vertices.
 |
| How we started our fish. |
 |
| The plane rotated 90 degrees. |
In the files that were provided with the Maya tutorial, we were given several files that would be linked to the lessons. I scrolled through and one of which was a rough picture of a cartoon fish. We we end up using this temple to create our fish to.
The reason that I created a plane was so that I have something to put the fish template on. The plane acts almost as a 3D piece of tape. We can then create a material on the plane and set it to the image of the fish template.
 |
| The fish template pasted onto the plane. |
 |
| The fish with a cube on top. |
 |
| The vertex moved into the right position. |
 |
| The fish with a basic tail fin. |
The next thing that we are going to do is create the tail fin, now I got this part straight away, I had to re-shade the fish then rotate so that I could see the back of the fish. Then by right clicking and selecting the faces, I selected the bottom two and then went to edit mesh, then to extrude. By doing this I can bring out the faces. as you can see in the picture above, I done it several times so that it gives me so much more variety when it comes to building the fin fully.
The extrusion tool is probably one of the most important pieces of equipment of Maya, this is used to create all sorts of landscapes. Its also very useful when trying to put detail into an object ready for a game.
 |
| The fish's tail fin now looks more realistic. |
 |
| The lips of my fish. |
Our next task from George was to create the fins. What we were told to do was to grab the lowest face and to extrude it. Once we had done this we would end up selecting the two faces on the top and bottom of the extrusion and add a wedge face. This provides a sample coming off of it on both sides.
 |
| The fins. |
There is a really handy tool that is available on Maya and its called the insert edge loop tool. What this does is creates another division, along anywhere that you want. This is used if you want to add in that extra detail. For this tutorial, we were told that we would be using it to create the eye socket., again putting it in the Y and X axis. we would then end extruding it inside the fish and then deleting the faces on the inside to create a hole for the eyes to sit.
 |
| The eye socket. |
To copy what we have done on this side to the next side, I simply selected the layer of plane that the fish template was on and have it made invisible. I then proceeded to select the fish by dragging over it and going to "edit" and Duplicate special. This meant that whatever I had done on the first side, it would be replicated on the other.
 |
| The duplication process. |
 |
| The eyeball being placed into the socket. |
The only thing that was left to do was the fin. This was something that I could do without the help of Mr Maestri, so I shut him down and did it myself. I grabbed the faces on the top of the fish and extruded them. Afterwards I scaled them together and thinned them out using various tools.
 |
| The addition of the fin. |
Now that I had finished the tutorial of the fish, there was nothing left to do, or was there? I decided that I wanted to go the extra mile and have my fish colored. The way I did this was to create a new material on top of the fish and color it in with one of my favorite camouflages. Once this was done I selected the mouth of the fish and choose that to be white.
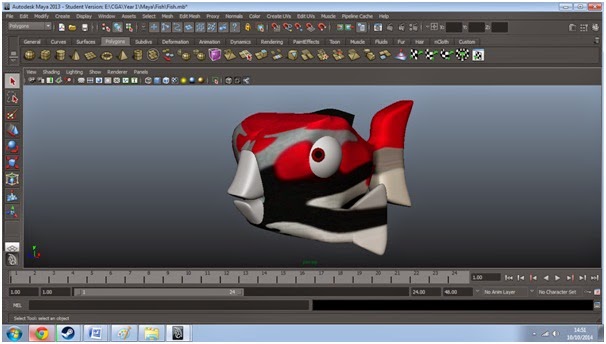
Overall I am extremely happy how the fish turned out at the end. I love the way his eyes and mouth look. If I could improve one thing, it would probably be his tail, I feel towards the end, it could have been a lot thinner.
I thought that the tutorial from Lynda.com was really helpful and I honestly believe that I learnt a great deal by using it. I am looking forward to doing a lot more with it soon.
No comments:
Post a Comment